8 posts tagged with "Learning"

View All Tags

· 2 min read

Git config 是定義了 Git 環境的設定檔,這些檔案可以被存放在三個地方。

Git Config 環境層級

  1. System 層級的:/etc/gitconfig/

    用於針對所有用戶的設定

    可以透過以下指令來針對 system 層級做設定。

    $ git config --system
  2. 用戶層級的:~/.gitconfig

    用於針對個別使用者的設定

    可以透過以下指令針對用戶層級做設定。

    $ git config --global

    個人是習慣 git 的相關設定會設置於用戶層級的,因此大多設定內容都在~/.gitconfig內。

  3. 專案層級的:/.git/config

    個別專案設定的

    可以透過以下指令針對專案層級做設定。

    $ git config

    大多如 remote 倉庫的位置等資訊都是設置在這個層級的。

在這三個層級裡,專案層級的東西會去覆蓋用戶層級的,而用戶層級的內容會去覆蓋 System 層級的。

Git 規格覆蓋的準則:專案層級 > 使用者層級 > 系統層級

· 3 min read

curl 是一個同 wget 為 Linux 上方便的指令,可把網頁抓下來進行分析。一般來說當工程師撰寫完 API 後,都需要進行 HTTP Request 來測試,目前有像 postman 方便的 GUI tool,但如果懶惰或不想啟動較吃資源的 GRU tool,此時我們就可以透過 curl 指令幫助我們測試。

以下我紀錄個人覺得較常用之指令。

curl GET

crul 預設為使用 GET 請求,一般來說指令組成結構為curl [option] [URL]

下方我們會以 httpbin 作為 HTTP Request 的 URL 並說明常用 option 選項。

補充:httpbin 回傳會以 JSON 格式為內容格式。

curl https://httpbin.org/get
//取得對httpbin進行get的回傳內容

curl -I https://httpbin.org/get
//只需要顯示response header
//其實就等於 curl --head hhttps://httpbin.org/get
//-I為簡寫,可透過curl -help查詢

curl -o abc.txt https://httpbin.org/get
//將httpbin進行get的回傳內容儲存下來,並存在一為abc.txt的檔案內
//小寫"o"為下載請求資源到新的檔案
//檔案之名稱與副檔名可自行設定

curl -O https://httpbin.org/get
//同為將httpbin進行get的回傳內容
//大寫"O"為使用指定網址伺服器的檔名作為下載之檔名

curl -L google.com
//檔網頁進行redirect時,連到redirect網址
//可以試看看沒有加上"-L"的狀況

curl https://httpbin.org/get -H "accept: application/json"
//設定request所要挾帶的header
//這邊設定告知伺服器用戶端可解讀JSON內容

curl POST/PUT/......

除了最基本的 get,可以使用"-X"決定要進行"GET|POST|PUT|DELETE|PATCH"哪個 http method。

在我們使用-X 得時候,我們常常會使用到下列的指令。

-H 夾帶的header
-d 夾帶post data內容
-u 夾帶使用者帳號密碼
-b 攜帶cookie
curl -X POST "https://httpbin.org/post" -d "email=abc@gmail.com" -H "accept: application/json"
//進行post時,夾帶email內容
//要使用其他的http method 更改-X後面的名稱

curl -X POST "https://httpbin.org/post" -b "num=20"
//設定cookie num=20

curl -u "abc:200" https://httpbin.org/get
//若網頁有使用basic auth,可以使用-u夾帶帳號密碼過驗證

· 3 min read

透過 Hostname 來決定使用哪一組帳號的 SSH Key 進行溝通。

SSH 生成

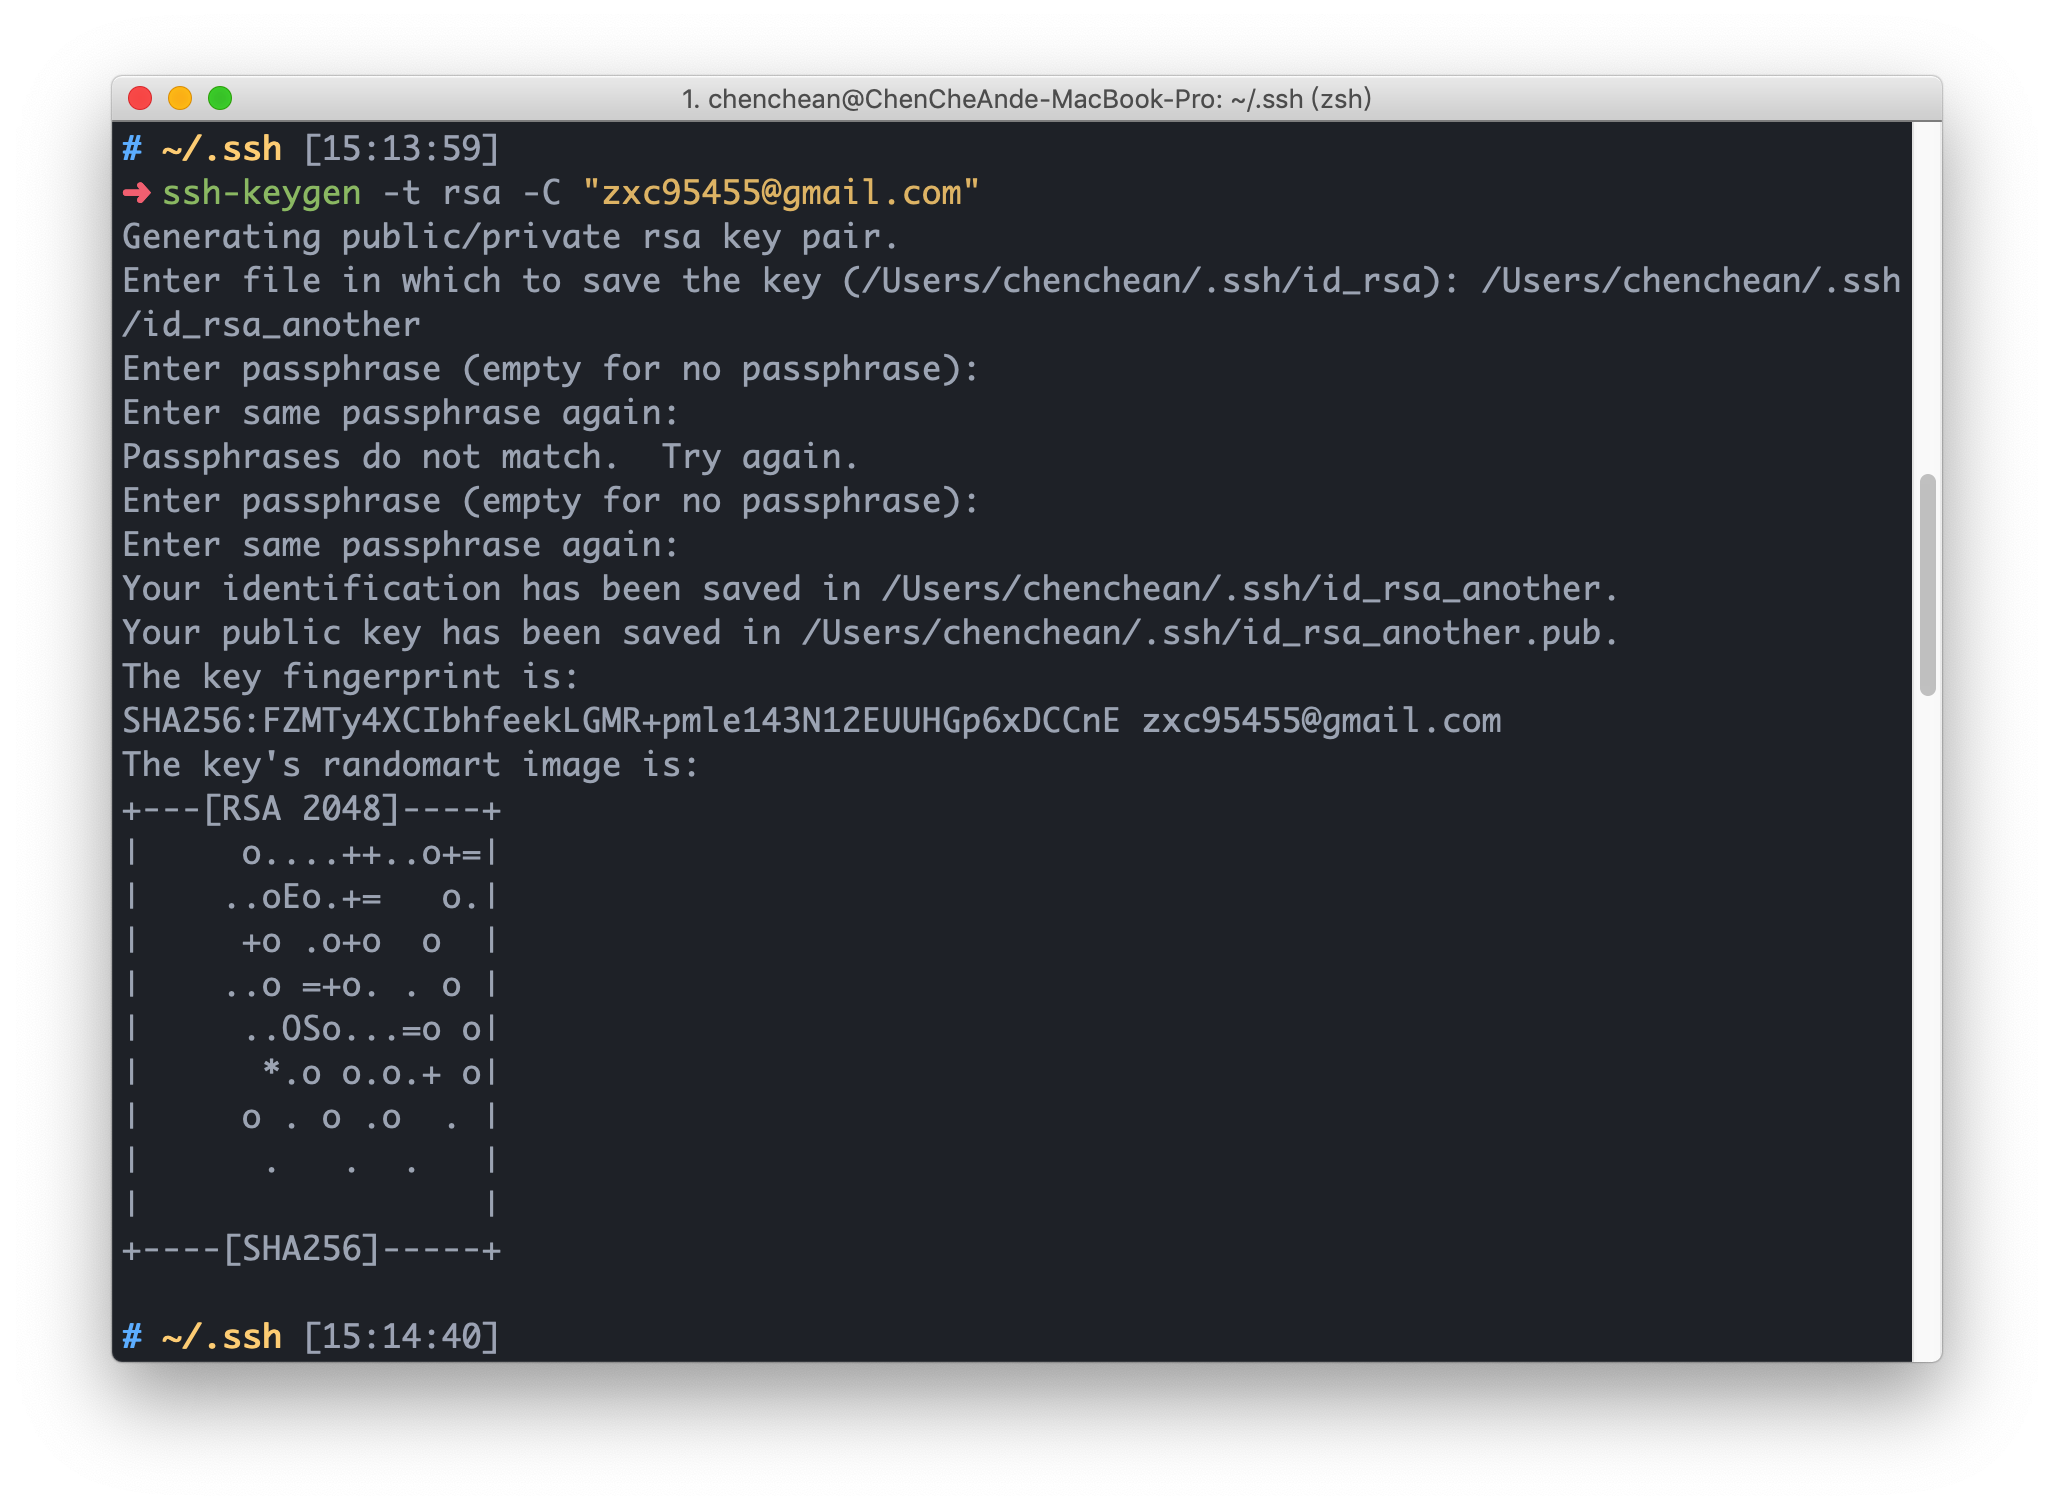
首先我們先使用ssh-keygen指令生成金鑰

圖中我們的指令為ssh-keygen -t rsa -C "email@gamil.com"

  • -t 為加密方法的選擇,我們選擇使用 RSA 加密
  • -C 為註解,會加入 SSH 的金鑰。可做為金鑰持有者的辨識。

輸入上述指令後,會分別詢問

  • 金鑰存放位置和檔案名稱
  • 是否設置 Passphrase(如有輸入,會須重複輸入一次)

上述均輸入完畢後,會產生 id_rsa 和 id_rsa.pub(這邊以預設檔名說明)

  • id_rsa 此為私鑰,也就是要自己保管好的密碼。
  • id_rsa.pub 此為公鑰,也就是對外公開的鑰匙,此會作為與本地端私鑰溝通使用。

將生成的金鑰複製到 Github

如果使用 linux,可以直接使用 ssh-copy-id 複製。

mac 如要使用 ssh-copy-id,需使用 Homebrew 安裝。

  • mac 還可以使用 pbcopy 來複製,指令pbcopy < ~/.ssh/id_rsa.pub

或是去打開檔案複製都可以。


設定 ssh config 方便選擇對應的 git 倉庫

在金鑰該層目錄,新增一 config 檔案。

可以使用nanovim之類編輯都可以,看個人習慣。

nano ~/.ssh/config

新增下列資訊

Host github.com
HostName github.com
User git
IdentityFile ~/.ssh/id_rsa

Host github-another
HostName github.com
User git
IdentityFile ~/.ssh/id_rsa_new
  • Host 後面的 github.com 或 github-another 就是你要連接倉庫的簡稱。
  • HostName 填 HostNmae 的 domain 或 IP,因為是連 github,所以是 github.com。
  • User 登入 SSH 的 username,個人習慣統一為 git。
  • IdentityFile key 的路徑。 其他還有 Port 或 ForwardX11 等指令。不過我們是連 github,所以不需要。

設定完成後 可以下ssh -T <Host>檢查。 ex: ssh -T github-another


Clone 與 push

  • Clone: git clone <host-in-ssh-config>:<username>/<repo>
  • Push: git remote set-url origin <host-in-ssh-config>:<username>/<repo>

補充

以往只有單一一組的 github,我們會直接在 git 的 global 設定好 username 和 email。

但在有多組的 github 帳號後,如不想均使用相通的名稱。 需先使用git config — global — unset user.name git config — global — unset user.email取消 global 設定。

再根據 Repo 來決定 User 資料

  • git config user.name "userName"
  • git config user.email "eamil"

· 3 min read

Google Apps Script(GAS)是什麼,可以參考wiki的介紹。但我一般會把它解釋成一個後端,類似 nodejs 之類的。

在 GAS 裡面,你可以透過 JavaScript 去連接 Google 的各類服務,或是去連接 Google 的 Firebase 資料庫也是可以的。這邊我們會使用 GAS 來串接 Google Sheets。

GAS 連結 Google 表單

要開啟 GAS 的編輯器,可以從 Google 表單上方的工具列 工具>指令碼編輯器 或是在 Google 雲端硬碟右鍵>更多>Google Apps Script(要先連結 GAS 應用程式),開啟後副檔名應該會是 gs。

目前的 GAS 是可以使用 es6 語法的,但因為要做一些對應的設定,這邊我們會使用較舊的 JavaScript 語法撰寫。

function doPost(e) {
//取得參數
var params = JSON.parse(e.postData.contents);
var num = params.num;
var one = params.one;
var one_other = params.one_other;
var boss_one = params.boss_one;
var to = params.name;
var date = params.date;

//sheet資訊
var SpreadSheet = SpreadsheetApp.openById("");
var Sheet = SpreadSheet.getSheets()[0];


//setValue...
...

return ContentService.createTextOutput(params);
}

上述我們撰寫了一個 doPost 的 function。 doPost 其實就是我們在 Call 這隻 gs 檔的 API,進行 post 時會觸發的 function。

我們可以先透過 e 這個參數取得 post 的資料。 接下來透過SpreadsheetApp.openById("")選擇要開啟哪個 Google 表單的檔案,再透過SpreadSheet.getSheets()[0]綁定好選擇的檔案裡面的哪張表(0 表示第一張表)。

選擇好表後,就可以透過 getRange()取得表的指定格子位置,並透過 setValue()或 setFormula()方法來將值存入。

最後的 return 則是要回傳什麼內容。

GAS 部署

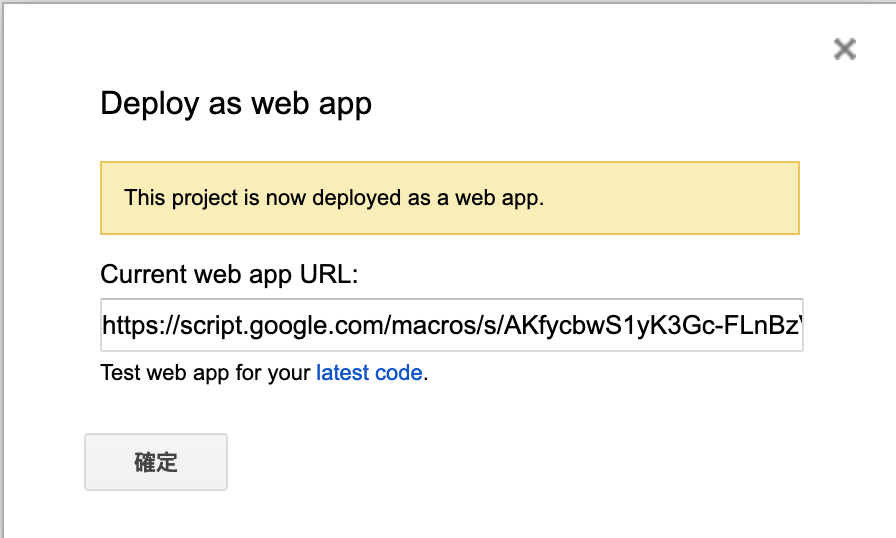
在寫完 GAS 的 code 後,我們要部署並產生 API。 選擇發佈>部署爲網路應用程式,將具有應用程式存取權的使用者改爲 “Anyone, even anonymous“ ,並點選部署。

接下來第一次部署會出現權限核對的一些設定。 基本上就是核對權限>選擇自己的帳戶>進階>前往>允許。 點選完畢後會出現下圖

那串 URL 就是你的 API 路徑。


補充

  • 在 GAS 內沒有 console.log(),要使用 Logger.log()

  • GAS 的 goGet()和 doPost()方法,不能直接 return 一個 object。但可以轉成 JSON 回傳,詳細可參考

· 2 min read

要製作 Discord Bot 目前主要有兩個 API 可以使用。

  • discord.io (官方維護)
  • discord.js (民間版本)

但從 npm 上可以發現目前 discord.io 已經約兩年沒有更新了,如果遇到任何 Bug,要等到官方修復可能需要一定的時間。也因此較推薦使用 discord.js 這個非官方的套件。


製作方法

  • 先去 discord 官方建立一個 bot(可參考 discord.js 上的教學)
  • 把 bot 加入你所要放置的頻道
  • 開始撰寫你的 bot
// 讀取discord.js套件
const Discord = require('discord.js');

// 建立一個Discord client
const bot = new Discord.Client();

// 當你要啟動這個bot時,會執行的事情
bot.on('ready', () => {
console.log('Ready!');
});

// 在建立一個bot時會取得token,這邊要輸入token
bot.login('your-token');

上述輸入完後,就會在你的 Discord 頻道看到 Discord 機器人。 {% asset_img bot.png %} 我這邊因為已經啟動上述的 code,所以 bot 會是線上的狀況,如果沒有執行的話,會顯示離線。

在建立完 bot 之後,接下來就是要開始監聽輸入的內容。

// message裡面會有使用者輸入的內容和使用者資料等等
bot.on('message', message => {
console.log(message.content);
});

我們只需要去監聽使用者輸入的內容做相對應得事情。 例如使用!作為 bot 要回覆得行為偵測, 接下來就可以使用 switch...case 的寫法,來判定!後面的內容 如果!後面的內容並不是定義好的 可以再使用 default 來回覆錯誤訊息。

· 5 min read

App.js 文件配置

//引入第三方middleware package
//引入http-errors套件
var createError = require('http-errors');

//引入express套件
var express = require('express');

//引入path套件
var path = require('path');

//引入cookie-parser套件
//接收到cookie資料做解析
var cookieParser = require('cookie-parser');

//引入morgan套件
//可以記錄各種事件資料
//例如進行get 或 post等行為
var logger = require('morgan');

//連接透過express.Router()產生實例的router
var indexRouter = require('./routes/index');
var usersRouter = require('./routes/users');

var app = express();

//模板引擎 這邊使用pug 要使用ejs將pug換成ejs
// view engine setup
app.set('views', path.join(__dirname, 'views'));
app.set('view engine', 'pug');

app.use(logger('dev'));

//可以透過json或一般的字串取得get post等資料
app.use(express.json());
app.use(express.urlencoded({ extended: false }));
app.use(cookieParser());
//靜態資料 抓到根目錄/public 資料夾
app.use(express.static(path.join(__dirname, 'public')));

//使用上方引入的./routes/index 來管理根目錄router
app.use('/', indexRouter);
//使用上方引入的./routes/user 來管理user router
app.use('/users', usersRouter);

//如果上方的router都沒進入,抓取錯誤
//透過http-errors套件顯示404錯誤
//也可以自定義404錯誤要顯示的title,這邊title定為"This item is not exist!"
//要顯示其他訊息 將404改成其他http狀態碼
// catch 404 and forward to error handler
app.use(function (req, res, next) {
next(createError(404, 'This item is not exist!'));
});

//錯誤的處理
//預設的處理方式是僅在開發的過程中提供錯誤訊息
// error handler
app.use(function (err, req, res, next) {
// set locals, only providing error in development
res.locals.message = err.message;
res.locals.error = req.app.get('env') === 'development' ? err : {};

// render the error page
res.status(err.status || 500);
res.render('error');
});

module.exports = app;
上述為 express App.js 的默認設定。

但在實際上,express-generator 產生的專案,package.json 內 npm start 實際上是去執行"node ./bin/www",也就是執行 bin 資料夾裡 www 的檔案。下面簡單紀錄 www 文件配置。


bin/www 文件配置

#!/usr/bin/env node

/**
* Module dependencies.
*/
//有載入上述說明的app.js檔設定
var app = require('../app');
var debug = require('debug')('expr:server');
var http = require('http');

/**
* Get port from environment and store in Express.
*/
//設定port 如果環境有預設使用環境預設的,沒有就使用3000 port
var port = normalizePort(process.env.PORT || '3000');
app.set('port', port);

/**
* Create HTTP server.
*/

var server = http.createServer(app);

/**
* Listen on provided port, on all network interfaces.
*/

server.listen(port);
server.on('error', onError);
server.on('listening', onListening);

/**
* Normalize a port into a number, string, or false.
*/

function normalizePort(val) {
var port = parseInt(val, 10);

if (isNaN(port)) {
// named pipe
return val;
}

if (port >= 0) {
// port number
return port;
}

return false;
}

/**
* Event listener for HTTP server "error" event.
*/

function onError(error) {
if (error.syscall !== 'listen') {
throw error;
}

var bind = typeof port === 'string' ? 'Pipe ' + port : 'Port ' + port;

// handle specific listen errors with friendly messages
switch (error.code) {
case 'EACCES':
console.error(bind + ' requires elevated privileges');
process.exit(1);
break;
case 'EADDRINUSE':
console.error(bind + ' is already in use');
process.exit(1);
break;
default:
throw error;
}
}

/**
* Event listener for HTTP server "listening" event.
*/

function onListening() {
var addr = server.address();
var bind = typeof addr === 'string' ? 'pipe ' + addr : 'port ' + addr.port;
debug('Listening on ' + bind);
}

express router 上個人常用的指令

req -> request

res -> response

  • req.params
    • 取得路徑參數值
    • ex
    app.get('user/:number', function (req, res) {
    var num = req.params.number;
    res.json({ number: num });
    });
  • res.json()
    • 輸出 json 資料
  • res.render()
    • 渲染指定畫面
  • res.redirect()
    • 網址重新導向

其餘大致上是邏輯的處理。


補充

  • req.params. ...
    • 撈出路由設定的資料
  • req.query. ...
    • 取得網址的參數
  • app.use()
    • 使用 middleware
    • 類似一層一層的過濾,中間可以處理 http 的 request、response 或一些檢查動作等等。
    • 參考

· 4 min read

ESLint 是一個 code 的檢查工具,他可以幫我們檢查我們 code 是否符合我們所設定的規範,並指出在哪裡。而 code 有著一定的規範,可以讓我們在團隊開發中,有著統一的標準,讓整個團隊開發更一致;對於個人則是可以讓我們學習許多資深開發者的想法,有助於個人程式碼攥寫的提升。


ESLint 安裝

自己較常是全域安裝

npm install eslint -g

要注意 ESLint 對於 node 和 npm 版本有要求,如果不符合 ESLint 所要求的版本,請將 node 和 npm 安裝到目前的穩定版本。 {% asset_img 2.png %} 一般我會使用

npm install npm -g

將 npm 重新安裝 再透過

npm install n -g

安裝 n 模組 這個 n 模組其實就是 node 的版本管理工具

可參考官方介紹&n 模組

在中國的 SegmentFault 也看到一篇不錯的說明,有興趣的可以參考

請注意上述 node 版本更新不適用 windows 上,windows 上請直接下載最新版的 node 並進行覆蓋,或參考官方說明文件,如何在 windows 上安裝多版本 node

ESLint 建置

在專案中,使用

eslint --init

建置.eslintrc.js 文件 {% asset_img 1.png %} 建置過程中會問一些設定的問題,根據選項去選擇即可。至於 style guide 部分,有三種規範可以使用。分別是

  • Google
  • Airbnb
  • Standard

其中 Airbnb 規範最嚴謹,Google 次之,個人是選擇 Airbnb。關於 Airbnb 的規範,可參考 此連結。目前已經有繁體中文版,上方連結可找到。

在選擇完規範後,會選擇要以 yaml、js 還是 json 儲存規範,這邊選擇 js。

重開安裝 eslint 的專案,在問題部分就會提醒你 code 哪邊不符合規範。 {% asset_img 3.png %} 比如說括號前後要空格,或是 props 參數沒用到等等。

在.eslintrc.js 的文件中,會有許多的設定。

  • parser 是解析器,可以根據專案設定不同。
  • extends 可以設定一些設定好的規範,如前面提到的 Airbnb 規範,就是寫在 extends 裡。
  • rules 是指額外的規則,像上方圖片裡面有一條提到 js 文件裡面不能寫 JSX,這個問題我們即可在 reles 加入"react/jsx-filename-extension": [1, { "extensions": [".js", ".jsx"] }],來解決。
  • ecmaFeatures 是設定可以使用哪些額外功能,像可以使用 JSX 等等。
  • plugins 使用一些額外的第三方套件。
  • env 環境,個人主要在 browser 和 node 上。 關於 eslint 文件設定方法和參數設定,可參考連結

· 6 min read

在 mac 上安裝 nginx 可以使用 brew 進行安裝

brew install nginx

安裝完可以下

nginx

來啟動服務

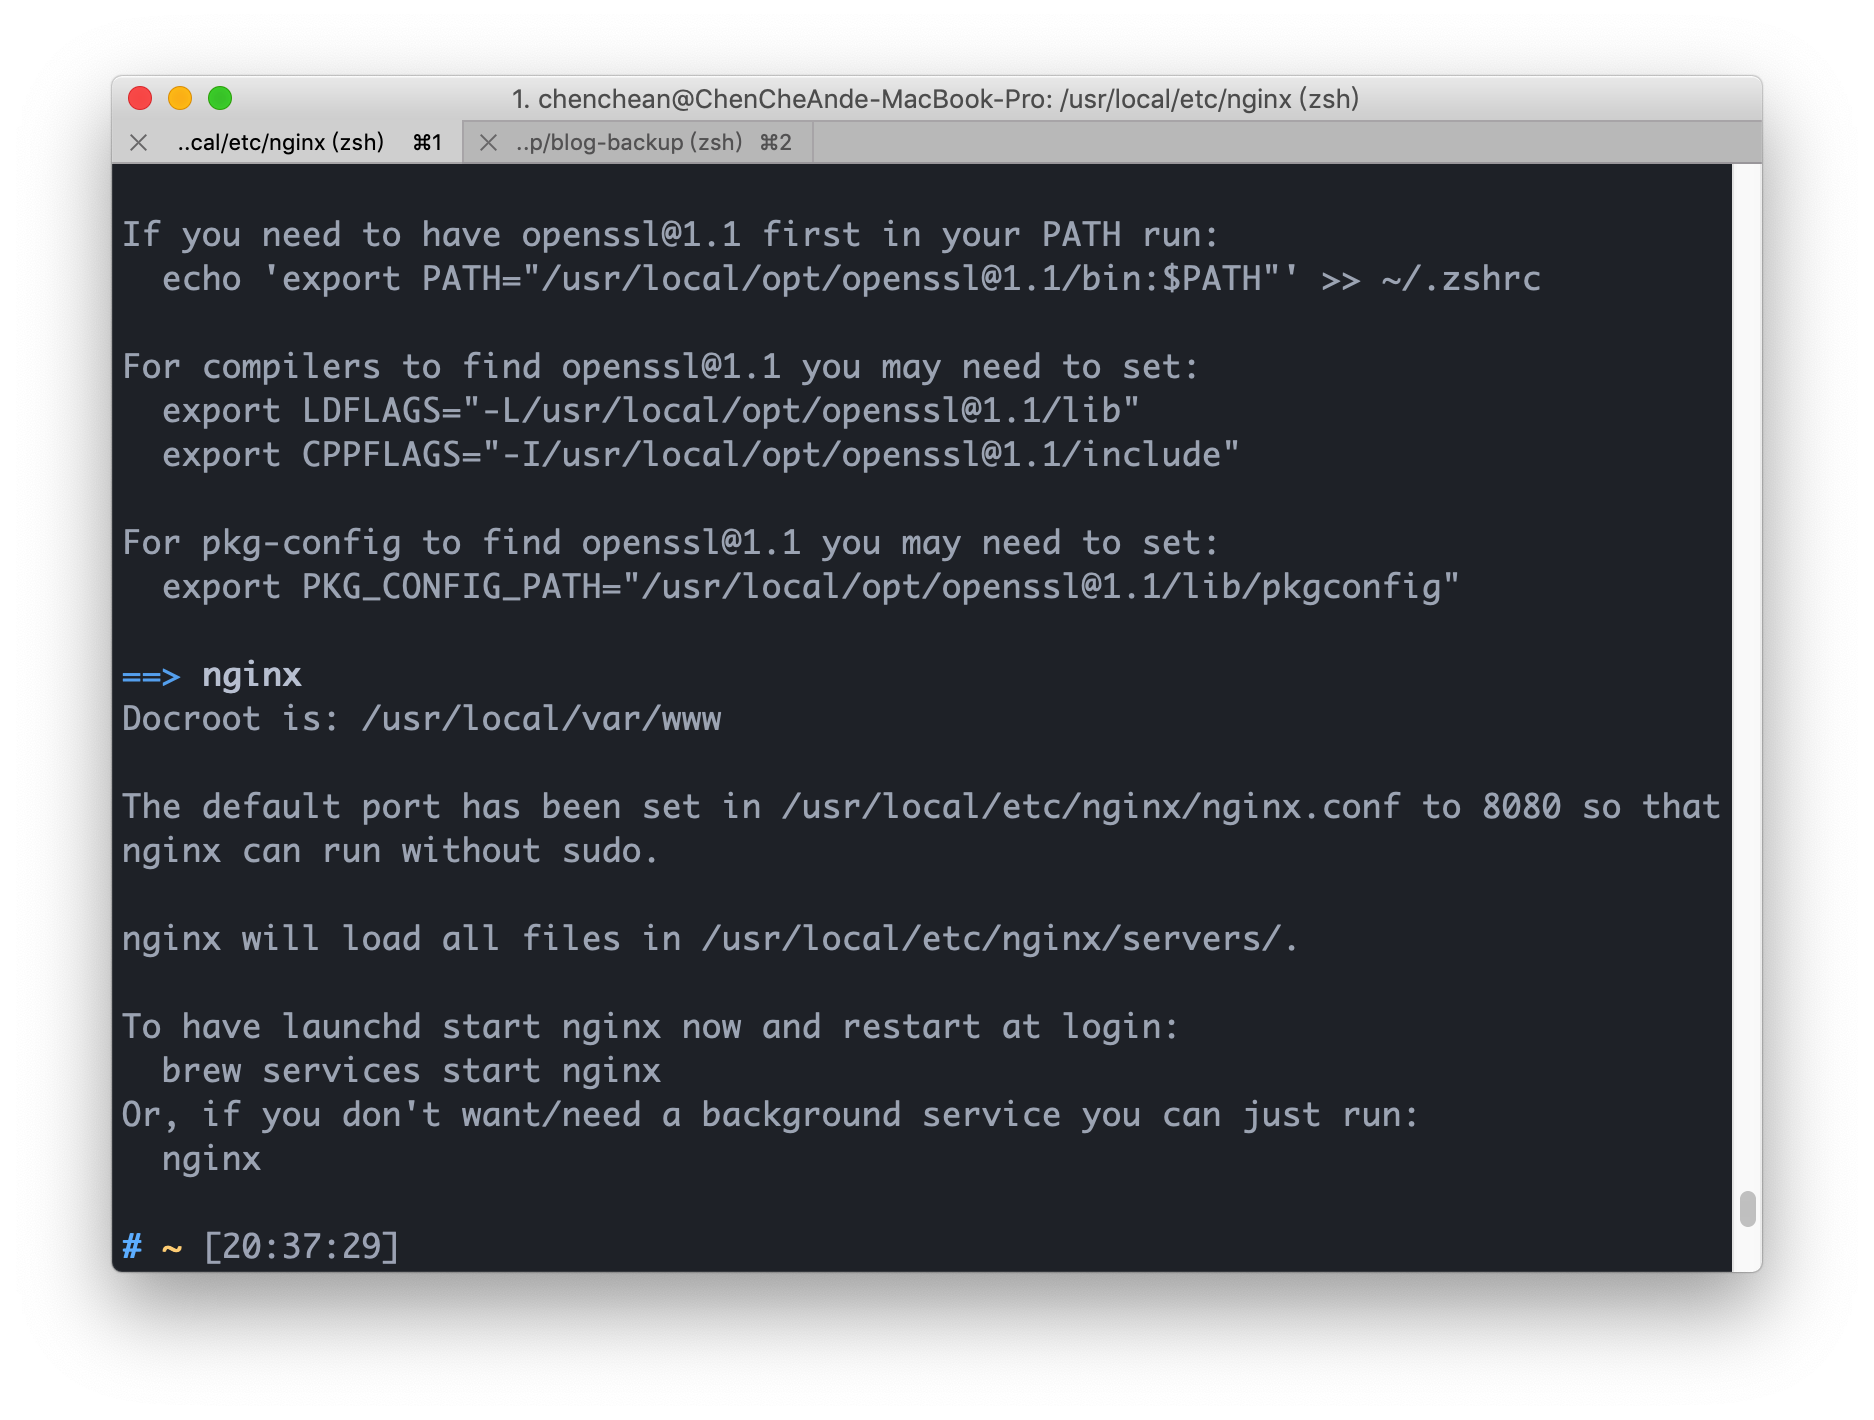
從安裝完的畫面我們可以知道 nginx.conf 這個重要的設定文件路徑為/usr/local/etc/nginx/nginx.conf


nginx.conf

我們先以原始的內容做說明 下方的#及為註解的部分

#基本上就是啟動這個服務的用戶是誰,通常可以不進行設定
#user nobody;

#通常在直接作為伺服器的server上面,會將worker_processes設為server CPU的core數量
#也可以直接使用auto 讓Nginx進行偵測
worker_processes 1;

#下方為Nginx的錯誤日誌
#前方的error_log為關鍵字,不可更改
#logs/error.log為存放錯誤日誌的位置
#後方的notice info為錯誤日誌的等級,其關鍵字有[debug, info, notice, warn, error, crit, alert, emerg],debug為紀錄最詳細內容的關鍵字
#更詳細的內容可以參考nginx docs error_log的介紹
#error_log logs/error.log;
#error_log logs/error.log notice;
#error_log logs/error.log info;

#官方的文件是指"Defines a file that will store the process ID of the main process" 個人是很少用到
#pid logs/nginx.pid;

events {
#每個worker同時可以處理多少連線
worker_connections 1024;
}


http {

#透過include mime.types這隻檔案來設定MIME的設定
include mime.types;
#HTTP 裡面Content-Type的一種
default_type application/octet-stream;

#紀錄的格式
#log_format main '$remote_addr - $remote_user [$time_local] "$request" '
# '$status $body_bytes_sent "$http_referer" '
# '"$http_user_agent" "$http_x_forwarded_for"';

#紀錄的位置
#access_log logs/access.log main;

#TCP優化部分
sendfile on;
#tcp_nopush on;

#keepalive_timeout 0;
keepalive_timeout 65;

#開啟gzip壓縮
#gzip on;

#server部分主要設定我們虛擬主機的設定
#server部分可以包成檔案,如xxx.conf
#並放置在/etc/nginx/conf.d 資料架下
#並透過include /etc/nginx/conf.d/*.conf 將全部.conf欓讀入,
#同時也可以做到多個虛擬主機的配置
server {
# 監聽的IP和port number
listen 8080;
#網域名稱
server_name localhost;

#charset koi8-r;

#access_log logs/host.access.log main;

//默認的位置和開啟的檔案
location / {
root html;
index index.html index.htm;
}

#error_page 404 /404.html;

# redirect server error pages to the static page /50x.html
#
#錯誤狀態時,要顯示什麼頁面
error_page 500 502 503 504 /50x.html;
location = /50x.html {
root html;
}

# proxy the PHP scripts to Apache listening on 127.0.0.1:80
#
#location ~ \.php$ {
# proxy_pass http://127.0.0.1;
#}

# pass the PHP scripts to FastCGI server listening on 127.0.0.1:9000
#
#location ~ \.php$ {
# root html;
# fastcgi_pass 127.0.0.1:9000;
# fastcgi_index index.php;
# fastcgi_param SCRIPT_FILENAME /scripts$fastcgi_script_name;
# include fastcgi_params;
#}

# deny access to .htaccess files, if Apache's document root
# concurs with nginx's one
#
#location ~ /\.ht {
# deny all;
#}
}


# another virtual host using mix of IP-, name-, and port-based configuration
#
#server {
# listen 8000;
# listen somename:8080;
# server_name somename alias another.alias;

# location / {
# root html;
# index index.html index.htm;
# }
#}

# HTTPS配置
# HTTPS server
#
#server {
# listen 443 ssl;
# server_name localhost;

# ssl_certificate cert.pem;
# ssl_certificate_key cert.key;

# ssl_session_cache shared:SSL:1m;
# ssl_session_timeout 5m;

# ssl_ciphers HIGH:!aNULL:!MD5;
# ssl_prefer_server_ciphers on;

# location / {
# root html;
# index index.html index.htm;
# }
#}
include servers/*;
}

  • 上方內容中我們要瞭解到每個 config 都是由 directive 組成,而 directive 又可以分成 simple directive 和 block directive。
  • 簡單來說 simple directive 的結尾就是";"。
    • ex: worker_processes 1;
  • block directive 是使用"{}"所包起來。
    • ex: events {worker_connections 1024;}

文件說明

  • user nobody;

    • 基本上就是啟動這個服務的用戶是誰,通常可以不進行設定
  • worker_processes 1;

    • 通常在直接作為伺服器的 server 上面,會將 worker_processes 設為 server CPU 的 core 數量
    • 也可以直接使用 auto 讓 Nginx 進行偵測
  • #error_log logs/error.log;

    #error_log logs/error.log notice;

    #error_log logs/error.log info;

    • 為 Nginx 的錯誤日誌
    • 前方的 error_log 為關鍵字,不可更改
    • logs/error.log 為存放錯誤日誌的位置
    • 後方的 notice info 為錯誤日誌的等級,其關鍵字有[debug, info, notice, warn, error, crit, alert, emerg],debug 為紀錄最詳細內容的關鍵字
    • 更詳細的內容可以參考 nginx docs error_log 的介紹
  • #pid logs/nginx.pid;

    • 官方的文件是指"Defines a file that will store the process ID of the main process"
  • 最底層的 block directive 會有 event 和 http,同時這也被稱為 main context。

  • 補充 nginx 啟動關閉之指令

    • 啟動: nginx
    • 快速停止 nginx: nginx -s stop
    • 正常關閉 nginx: nginx -s quit
    • 重新載入 nginx 設置: nginx -s reload
    • 查看全部 nginx 程序運行狀況: ps -ef|grep nginx
      • ps 為查看全部程序的命令,-ef 為全部程序的全部內容